
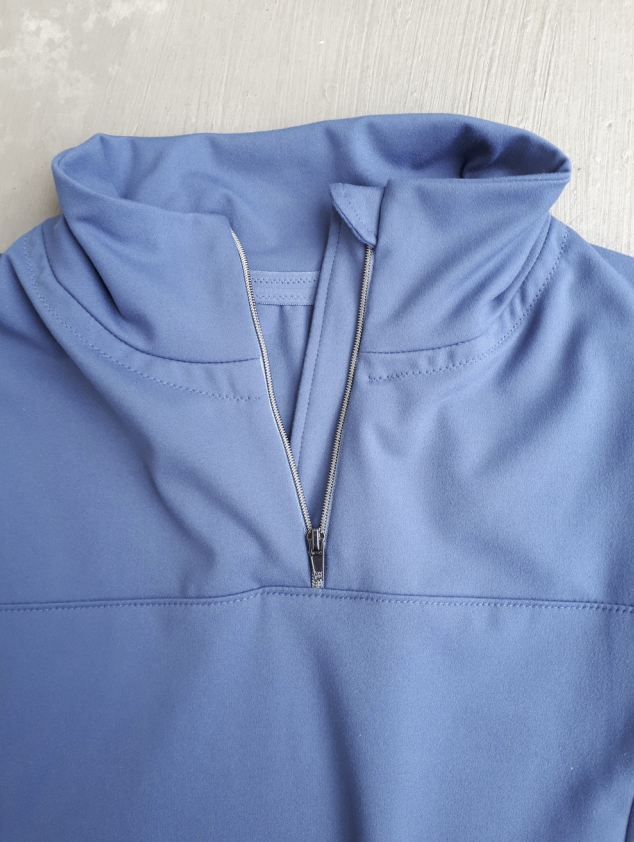
Zipper Garage Hack
Hi, I am Mona and I am going to show you a useful little hack for the Pacific Pullover. It can also be applied to the Lumia Zip Jacket and to the Whistler Jacket, I will say a few words about that at the end.
Pattern preparation:
We are going to add a horizontal seam to the centre front above the bust, to make the installation of the zipper easier. If you do not want to cut your master
copy apart, print or trace the centre front piece again. Draw a horizontal at the level of the armhole corner and cut the piece apart as shown. We will call this the upper and lower centre front. Add seam allowance to both pieces at the cut edge. Cut one of the lower centre front on the fold, and cut two of the upper centre front, not on the fold. (I also add a bit of seam allowance at the vertical edges of the upper centre front pieces. Some people say when you attach a zipper the bit of fabric that is taken away by the seam is added back in by the zipper itself, but I find that with they way I sew zippers, with the seam very close to the zipper teeth, this does not work.)

Zipper:
I prefer working with zipper tape, but you can also use a fixed length zipper (separating or closed does not matter, the bottom end is going to be stitched across and cut off anyway). I like cutting my zippers a bit longer than needed, so
that I can move the zipper pull out of the way during the installation. The precise length of the zipper is length of outer collar plus length of upper centre front minus 1 ¼ inch. Eyeballing the length of the outer collar and front piece and adding 1-2 inches works for me :)
Fabric for zipper guard: You can use a scrap of your main fabric or something else. It should be a lighter weight and feel pleasant against your skin. A brushed athletic or lingerie knit works well. You can prepare a paper piece for this, but I just cut it directly from the fabric. Measure the width of your zipper, double it and add 1 ½ inch. (The finished zipper guard should be a bit wider than the actual zipper, and you need seam allowance at one long edge as well.) For example: Zipper is 1 ½ inch wide, your fabric piece should be 4 ½ inches wide. The length of the piece depends on how much you want to fold over at the top. I find that a fold of 1 ¼ to 1 ½ inch works well. Therefore the precise length of the fabric piece is length of zipper plus length of folded bit plus 3/8 inch. Same as with the zipper, I just eyeball it and add 1-2 inches to be on the safe side :) \

Sewing steps before installing the zipper
Join the back and upper centre front pieces at the shoulders. Attach the outer collar to the neck edge.
Step 1: Create the Zipper Guard
Fold the fabric piece lengthwise. Mark the desired length of the fold-over bit at the top and draw a curve along the open corner (not through the lengthwise fold). You can use a French curve for this or any round item like a glass or cup. Sew along the curved and vertical edge with a 3/8 seam allowance. Do not sew along the short edge at the bottom. Clip the seam allowance and turn the piece inside out.
Step 2: Attach Zipper to Zipper Guard
Now you have to decide on which side of your garment you want the zipper garage. It does not matter for its functionality, but maybe you have a preference :) In my pictures the zipper guard gets attached to the left side of the garment from the wearer‘s perspective. Lay the fabric piece with the curved top pointing to the left. We want the zipper to be centred on the fabric piece, but in this step we are only attaching the right side. The top of the zipper should be just
below the desired fold. (If you are working with zipper tape, you can secure the top of it by melting, gluing, or folding it to the side, but the zipper pull will be stopped by the folded fabric anyway.) Use pins or wondertape to hold the zipper in place. Baste with a long straight stitch. This line of stitching does not have to be close to the zipper teeth. Nevertheless I would recommend using a zipper foot. Fold the curved top over the zipper and baste as well. You can also do this in one step while basting the zipper.

Step 3: Attach Zipper Guard to Garment
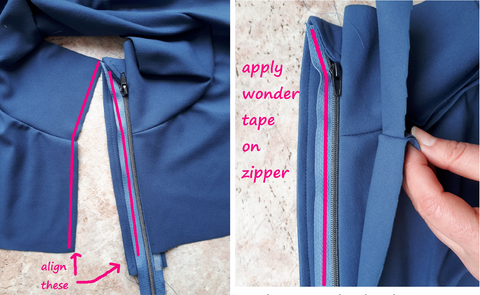
Put the zipper and the garment edge right sides together, garment edge aligned with the zipper edge, not with the guard edge! This works best if you lay the zipper guard right side up, apply wondertape on the garment edge, and carefully place it down onto the zipper tape. Pay special attention to the top of the collar, it goes beyond the folded zipper guard because we still need the seam allowance there to attach the inner collar. Stitch with zipper foot, close to the zipper teeth, with a medium length straight stitch. (There will be a relatively steep "bump" along your seam where the folded zipper garage ends. It is easy to end up with a pucker in the main fabric there. Go slowly and make sure the fabric does not bunch under the foot.)

Step 4: Attach Zipper to Other Side of Garment
Take a deep breath, you are almost done already! The only tricky thing left now is to get the other side aligned properly, so that the collar seam is in the same spot. For this I close the zipper, apply wondertape on the zipper tape, and carefully place the garment edge on the zipper right side down, with the top of the collar going beyond the zipper again, and making sure the collar seam is aligned precisely.
I can also recommend stitching this in two steps, starting at the collar seam going in one direction, then in the other. Yes I‘m a bit obsessed with that collar seam.

This is your zipper guard done! Yay!
Sewing steps after zipper installation
If you want to topstitch the zipper seams, now is the time to do so. I prefer mine without topstitching most of the time. Next, I complete the inner collar. My usual method for this resembles the Lumia instructions rather than the Pacific Pullover instructions. In any case it is a bit easier to do now than after you have assembled the whole front. Then stitch the lower centre front to the upper centre front. As you are going over the zipper, I recommend doing this with a sewing machine and stitching slowly through the zipper teeth. You can trim away the zipper teeth in the seam allowance and go over the seam again with a serger. Topstitch the seam allowance towards the lower front. Stitch the side panels to the centre front, continue with the rest of the assembly according to the pattern instructions.

Zipper Guard for Full Zip Jacket
If you want to add a zipper garage to the Lumia Zip Jacket or the Whistler Jacket, you have two options:
1) A zipper guard for the full length of the jacket. The bottom end will be hidden inside the band.
2) A short zipper guard that just covers the collar. In this case the bottom end of the guard needs to look neat, so start with two pieces of fabric, cut a curve at both ends, stitch along the curved edge, turn, then proceed with zipper installation. The non-curved long edge will be unfinished, but it will be hidden in the collar.


Comment
Thank you, thank you!!! I have zipper fear and was just going to cut out fabric for the Pacific Pullover when I just came across this post!! Perfect timing. Also saw the post for the sleeve pocket which is something I’ve dreamed of but knew I didn’t have the skill to pull it off!! Thank you for sharing both these hacks!!