

Hello, I’m An Ca and I live in a small country called Belgium. I am so honored to be a guest blogger for Greenstyle Creations. If you love my post you can visit my sewing blog, Flaxfield Sewing, or my Instagram account, flaxfield_sewing.
Do you know Pinterest? I’m sure you’ve heard of it. If you are looking for inspiration for your next sewing project, you will definitely find it there.
In one of my quests for cool, new ideas I came across this bomber. Super cure, right?

With the beautiful raglan sleeves, I immediately thought of the Midway Bomber! After some thinking, drawing and sewing this is my result.


I’m so pleased with my new jacket!
I would love to show you how I made this fun hack.
Are you following my tutorial?
Adjusting the Pattern
First you have to print the Midway Bomber pattern. I wanted enough ruffles in my waist so I printed my size and a size bigger (M and L). I graded the front and back pattern piece from a M under my arms to a L in the natural waistline (marked on the pattern).

Tape some blank sheets under the front and back pattern pieces.
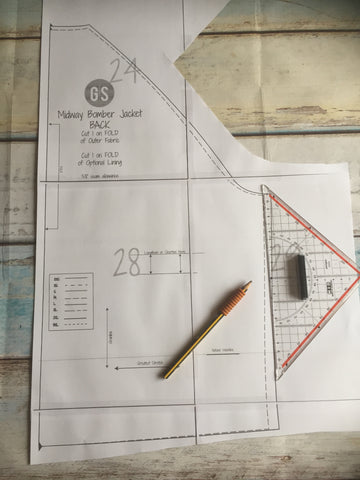
Now you can extend the center back line on the back pattern piece. I extended this line to 70 cm, but you can make your bomber jacket as long or as short as you want.


Now draw a perpendicular line at the bottom of the extended center-back line with your drawing triangle. This is the new bottom edge of your pattern piece, which will be attached to the bottom band.
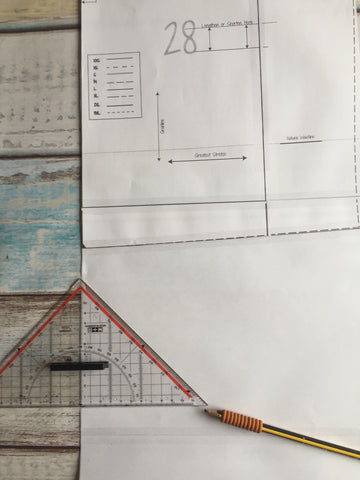
Extend the side seam of the back right up to your new drawn bottom edge. Measure this line. For me this is 45,5 cm.


We will now start with adjusting the front pattern piece.
You can extend the center front and the side seam on the front pattern piece.

When you sew back and front together, it’s important that the side seams are the same length. That’s why we're starting the measurement for the front pattern piece at the side seam.
The side seam of my back was 45,5 cm, the side seam of my front must now be exactly the same length. Mark that measurement (45,5 cm for me) on the side seam and draw a perpendicular line with your drawing triangle to the center front.


Your new pattern pieces are done!
Some new measurements ...
We've extended the mid front a lot. Of course, the length of the zipper in the instructions is therefore no longer correct. We need to determine the new length of the zipper.
Take the original waistband and the new front pattern piece.
Mark the seam allowance at the bottom and the top of the front piece and at the top of the waistband with a little line. Fold the waistband lengthways.
Overlap the front piece at the bottom with the waistband at the seam allowance (as in the picture). Measure how long your zipper should be. A zipper that is a little too long is not a problem, shortening is always possible.


We also need to adjust the length of the waistband because this will now be the bottom band.
To determine the new length, we will first indicate the seam allowance of the front and the back. Then we mark the seam allowance of the waistband extension. Overlap the pattern pieces as in the pictures.
You can now easily determine the length of the bottom band. You need to multiply the number you get (with me 46.5 cm) by 2. This is the measurement for your new bottom band. The width remains the same as in the original pattern Piece.

Now the best part begins … cutting your beautiful fabric and sew your stylish bomber!
Cutting and sewing …
Cut your pattern pieces as described in the pattern. Use your new front piece, back piece and bottom band. You don’t have to cut the original waistband.
I didn’t line my bomber and I skipped the pockets so I could start sewing with step 10 in the instructions. I followed closely every step and I can only say that the instructions are very clear and speak for themselves.
Apply the waist accent …
To create the nice waist accent with the wrinkles I used elastic of 4 cm width.
We start by determining the length of the elastic. Measure your waist circumference. Take this number and reduce it by 2 times the wide of the waistband extension.
Cut the elastic to this size.
Divide the elastic into 4 equal parts and pin a pin on each part.
Now we're going to distribute the elastic to the fabric of your bomber.
First, put on your bomber and decide where the elastic should be. At that height, we're going to attach it. We start at the same distance from the zipper as the bottom band. With me, this is 9 cm. Place the elastic on the fabric and put a pin in it.
Do the same on the other side.


Determine the middle of your back. Also take the middle of your elastic (where you previously put a pin) and pin these 2 midpoints on top of each other. Divide each half again in half and pin them together.
Make sure your elastic is everywhere equally far from the bottom band.


We now start by sewing the elastic to the fabric. Use a zigzag stitch or an elastic stitch on your sewing machine to secure al 4 sides from the elastic to your fabric.
It will be necessary to stretch everything a bit while you sew.


You're all done! Admire your beautiful, classy Midway Bomber.
I hope you love this tutorial and I wish you all every success when sewing it!
See you next time!
X
An Ca

