
By now you should have all of your pieces cut out and ready to sew. Today the goal is to sew the hood and attach it to the neckline. The instructions for the pattern are really good, so I won't go into detail on how to construct the shirt.
BUT, since some of you are new to sewing with knits, I thought I'd go over a few tips and tricks for the first day of sewing.
I use my 4 thread serger for almost the whole construction. The stretchy stitching of the serger is great for sewing knits and makes it oh so fast! With some knits you will need to adjust your differential feed a tad higher to keep them from being stretched out, so I recommend sewing on a scrap to get your adjustments just right. I also like to decrease my stitch length when I am sewing with a serger only. This stops some of the gapping you can sometimes get with serged seams. Some people really prefer to both stitch and serge a seam, but I only do that if I think a seam will get a lot of stress.
If you don't have a serger (or don't want to use it) then you can also easily sew your top on a regular machine as well.
To use a sewing machine for knits, there are a few preparations to make. First off, you should switch out to a ball point or stretch needle.

Using the correct needle will help stop the fabric from pulling into the bobbin casing when you start to sew and will also make a smoother and neater stitch.
Once you have the correct needle in the machine, you will want to set your machine to a stretch stitch if it has one. On my machine, the stretch stitches are in yellow below the regular stitches.
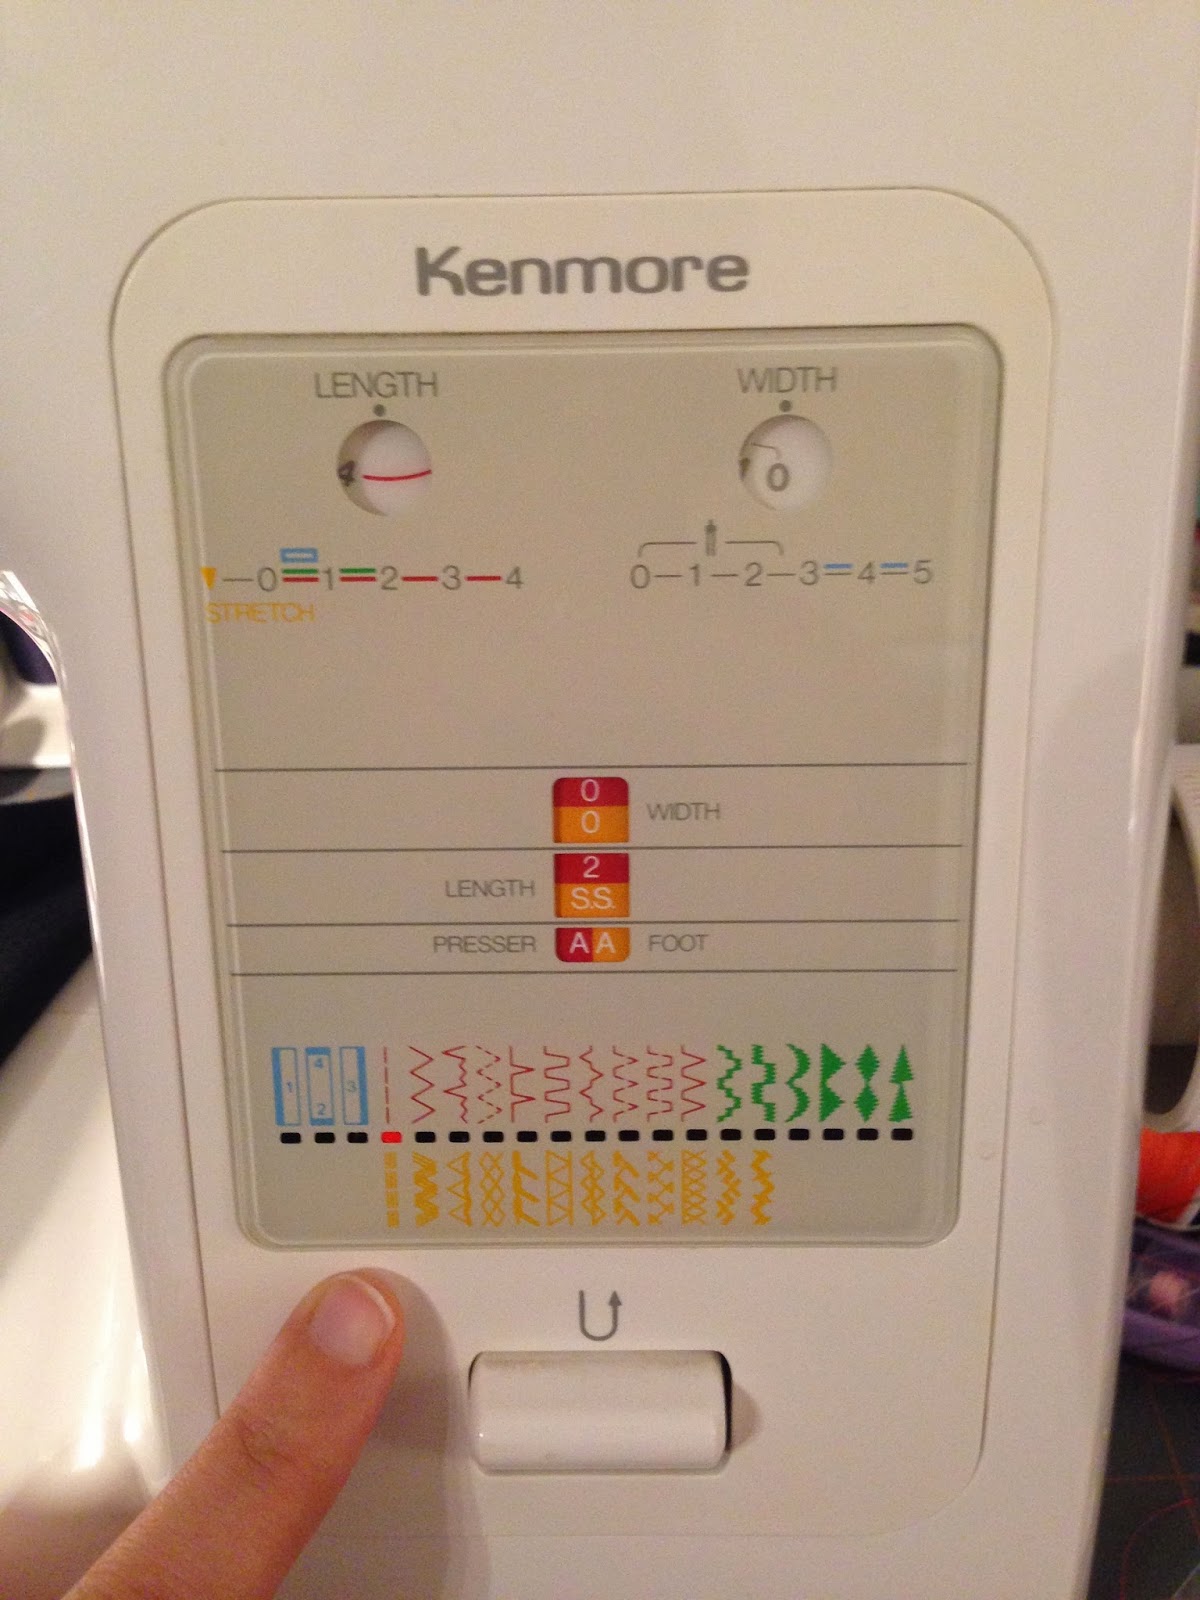
The length on my machine has to be set past the zero setting and then it converts to a stretch stitch. Your machine may be different, so take a look in the manual to get started.
I like to use the triple line stitch for my straight stitches, seams, cuffs, necklines, etc. I am pretty sure that "triple line stitch" is not the technical term, but I call it like I see it!

When you stitch with this one, it looks like this:

Another stitch I will sometimes use is a triple zig-zag stitch. I use this for when I need a lot of stretch but you won't see the stitching, like the interior stitching.

The red dot shows which one I have selected (keep in mind that it is the yellow stitch and not the red)
This is what the stitch looks like when sewn into the fabric:

These stitches allow for more stretch to a seam than a regular straight stitch. If your machine doesn't have one of these, don't worry! Just set your straight stitch to a longer length and decrease your tension slightly. That will also add a bit of stretch to your seams.
One more tip for sewing with knits is this:

Good old spray starch! If you have edges that are rolling or getting sucked under your presser foots, try spraying it with starch and ironing it crisp. This will help keep those edges flat and add some body to the seam to keep them running straight under the presser foot.
That's it for now, so let's get sewing!
Sarah

