

I have a fun modification to the Cambria to show you today! It's not like the Cambria Top (released in November 2020) doesn't already have plenty of options for customizing your new top. It has four necklines, three hem options, and three sleeve options in four different lengths. Essentially, you can make 144 different combinations for 144 different looks using the pattern as designed!
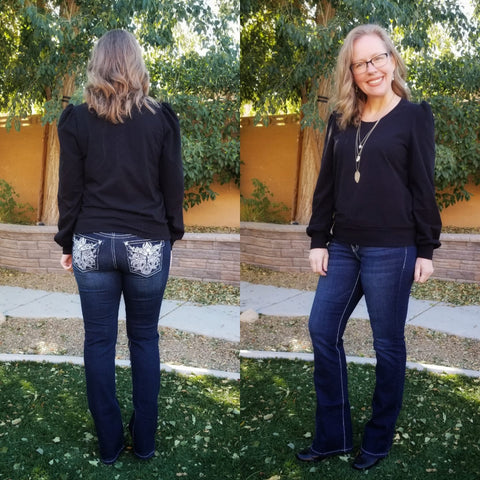
This was my first Cambria. It has a loose fit, low crew neckline, hem bands and sleeves gathered at both the top and bottom.
I immediately loved Cambria and made four more with different options in testing! But who can resist a good pocket hack? You should know that it's a compliment when I hack a pattern. It means that the base pattern is worth putting in the effort to add some of my own details. I am certain you will (or already do) love Cambria, and I hope that you will love this hack as well.

Let's get started! You can add this pocket style to any of the bodice fit, sleeve, and neckline options. (I recommend only using the banded hemline because the band provides support for the pocket bottom.) After printing, taping, and cutting your paper pattern pieces with the options that you have selected, set all of the pieces aside except for the front bodice. This is the only original piece that requires hacking.

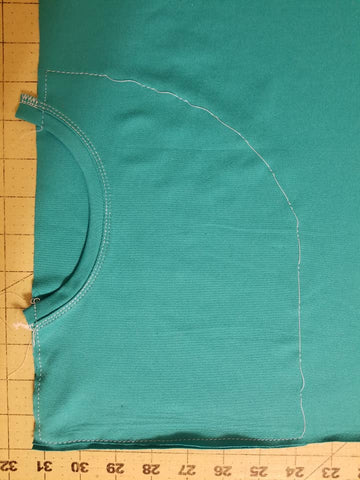
First, draw a curved line on the front bodice paper pattern piece where you want your round pocket to come to along the side seam of the bodice. (See drawing below.) You can use a protractor or compass to create the curve you want if you're into that sort of thing. Whether you freehand it, use tools, or trace a cereal bowl, make sure that the vertical pocket edge is perpendicular to the hem. This helps with pocket functionality. Trace this line (and the part of the side seam and hemline it intersects with) onto a fresh sheet of paper as shown below.
Next, measure down about 1.25 to 1.5 inches from the top of the curved line at the side seam and mark. This is where the top of the pocket opening will be. About 5 inches below this, make another mark, which is where the bottom of the pocket opening will be. Make a shallow oval line that extends about 1.5 to 2 inches in from the side seam. The more shallow and the less curved this line is, the easier it will be to band it without puckering and wear it without gaping. Cut on this line to create your pocket opening. Be sure the opening is toward the top of the pocket so that it will be functional.
Finally, create a new rectangular pattern piece that is 1.5 inches tall by about 7 inches long. You can use this piece to either band or bind your pocket opening. Here's what my new pattern pieces look like:

After you cut a hacked front bodice piece on the fold, two pocket facings in mirror image, and two pocket bands from your chosen fabric, it's time to start sewing!

First, fold your band strips in half the long way, wrong sides together, and line up the raw edges with the raw edge of the pocket opening on the right side of the front bodice. You can stretch the band slightly as you attach it, but do not stretch the bodice. Iron and topstitch with your coverstitch machine, double needle, or zigzag stitch.

Align the pocket facings with the front bodice by layering the front bodice (right side up) on top of the pocket facings (also right side up). Pin or clip in place along the sideseam and bottom edge.

Turn the bodice over and pin the pocket to the bodice from the back.

Using a sewing machine, baste along the edge of the pocket from the back (with the pocket facing on top). If you are feeling daring, you can use my basting hack, in which I baste a couple of stitches, raise the needle, lift the presser foot, move the fabric toward the back along the edge of the pocket an inch or two, drop the presser foot, baste a couple more stitches, and repeat. The purpose of this is to make it quick and easy to remove the basting stitches later.
After you finish basting, permanently stitch the pocket in place from the front of the bodice. (Alternatively, instead of basting and topstitching, you can simply zigzag or reverse coverstitch the pocket in place from the back.) Remove any basting stitches on the curved line.

Treating the front bodice as one piece, construct the rest of the garment according to the Cambria tutorial.

My rounded pockets hold my phone and dog treats pretty securely. I did a cartwheel to check. Okay, that's a lie, but nothing fell out while I walked the dogs.

Circular pockets are really trendy right now, but creating pockets that are rounded at the top and straight at the bottom also keep them functional.

The fabric featured in this blog is from The Fabric Fairy. The blue solid is a brushed, stretchy poly/spandex blend called Splendid that is similar to athletic brushed poly, and the tan heather is a smooth, Supplex-like blend of nylon/poly/spandex called Dharma. Although you can use any of the fabrics recommended in the Cambria tutorial to make your garment with dual rounded pockets, I recommend using heavier weight options such as athletic, cotton lycra, or French terry that are at least 200 to 220 gsm. (The pockets will look cute on lighter weight fabrics like double brushed poly, but they won't be very functional.)

Be sure to share your Cambria with dual rounded pockets in the Greenstyle Facebook group! I can't wait to see it!
Written by Beth Doglady

