
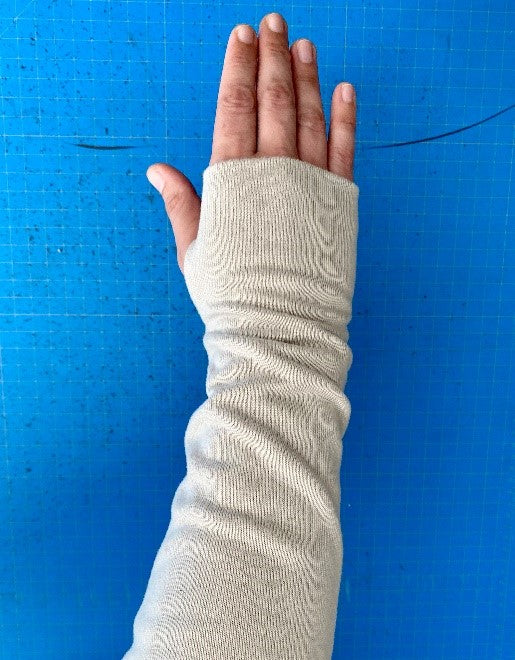
To add thumbholes to your Brighton Pullover, you first want to extend the cuff pattern piece. Since this pattern piece is cut on the fold, you’re only going to extend it by 1”. Take a scrap piece of paper, and using the existing angle, extend the lines. Do this for both sides.


At least two separate points on the extension piece, place a mark 1” above the bottom. You will then use these points and connect them with a straight line to finish creating the pattern extension piece.


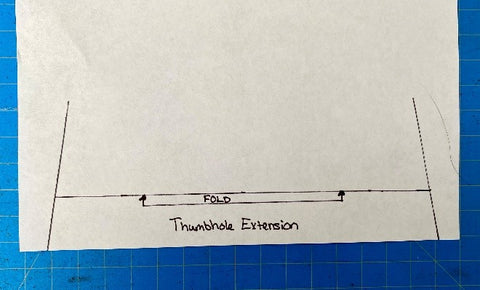
Cut this thumbhole extension out and tape it to the existing cuff pattern piece. You need to add one additional marking. From the original end of the arm cuff pattern piece, you will measure down 2” and place a mark. This will be used to transfer these points to your fabric.


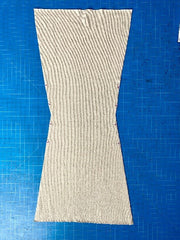
Take the modified Arm Cuff pattern piece and cut your fabric on the fold. Transfer two points from the pattern piece onto your fabric. Make one mark at the original pattern piece end point and another mark at the point we marked 2” below in step above. Make sure that you transfer these points to both sides of your fabric (left and right) and that you put them on both the right side and wrong side of your fabric. I like to use a disappearing fabric marker for this.


Once you unfold your fabric, it should look like the below. For future reference, these marks will be labeled 1 through 4 from top to bottom.

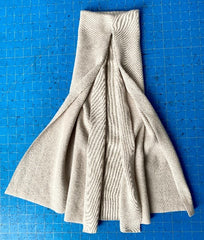
You will now begin to sew you arm cuff. Fold the fabric in half with right sides together hot dog style. Your first stitch line will be between points 2 and 3. I like to use the lightning stitch on my standard sewing machine for this.


Now take the top and bottom edges of your top layer of fabric and fold them back. After this, fold the cuff in half hamburger style so that your right sides of the fabric are together. In this position, marks 2 and 3 should be in line and marks 1 and 4 should be in line. Beginning exactly where the last stitch line left off, you will sew a line between these two points (where 1 and 4 meet and where 2 and 3 meet). Be careful not to catch the fabric that you folded down.


We will now repeat this for the other side. Find the two parts of the fabric that you had folded down in the previous step. To do this, I like to flip my cuff inside out. You will now place these two parts right sides together just like we did in the previous step. The same points should line up for this, just on the opposite side of your cuff. Marks 2 and 3 will line up and Marks 1 and 4 will line up. Just like in the previous step, stitch between these two points.


For this next step, some tutorials say to make your cuff look like a fortune cookie, but I prefer to turn my cuff so that it lays with right sides out. From the previous step, you can flip it out so that it lays how a cuff will normally lay once attached to a garment. This helps me to visualize which of the remaining points will need to get sewn together. Once you have it in this position, you can take the layer of fabric on the back side and flip it up. In looking at the cuff in this way, the top portion will meet to get sewn and the bottom portion will meet to get sewn.

Fold the cuff in half hot dog style with right sides together. Once it’s folded in half, you will line up the point where your previous seam ended and line up your cuff right sides together along the entire end. Sew two separate seams. One will be from your center point toward the top. The second one will be from your center point down.


Now just flip the top portion of your cuff over the bottom so that wrong sides are together and you have a completed thumbhole cuff!


The sewing process for this thumbhole addition very closely resembles the Greenstyle video previously posted for an option for the Sundance jacket. If you would like to watch this in action, the video can be viewed here:
https://www.youtube.com/watch?v=CXmnn5RsR4A

