Tutorial by Linda Stilling
Cut List:
Front Bodice top piece- cut at regular torso line
Binding #1 (cotton lycra)
Front Bodice bottom piece- directions below
Binding #2 (cotton lycra)
Front skirt piece- add 1” to top
Back skirt piece- gathered or straight
Back bodice, cut on long torso line
Cowl or Neckline
Sleeves of choice
Drafting Front Bodice Bottom Piece:
- Print pages 12-13, 16-17. Assemble
- Align ruler to fold line on front bodice and draw a line 1.25 inches down from bottom of neck curve.

- Cut, discard top half of pattern piece. Use bottom of new pattern piece to cut Front Bodice Bottom.

Bindings: stretch should go across longest side, all pieces 2 ¾” by:
- Binding #1, to bind bottom of front bodice top
Measure bottom of front bodice top piece, multiply by .85.
I’ve experimented with this number a little bit. A number closer to 80% (.80) creates a tighter more defined breast area where a number closer to 90% (.90) creates a more loose t-shirt look.
- Binding #2, to bind top of front bodice bottom
Measure top of front bodice bottom, multiply by .95.
I found that if I did it much more than this, the sleeves were pulled in since the binding ends up going into the armscye.
*If you really want to use a fabric that is not cotton lycra in the bindings, you can add
elastic into the casing or add height to each part and attach elastic as you would do in
swimwear.
Assembling Pattern
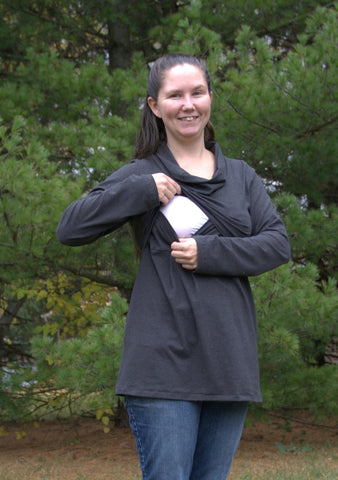
- Mark middle of Binding #1 and Front Bodice Top Piece. Fold Binding #1 wrong sides together and align raw edges with bottom of front bodice piece. Pin at each end and where middle marks meet. Stretch to fit. Sew. You could topstitch seam towards bodice, but I didn’t find this necessary. I’m a lazy seamstress as evidenced by my white thread on dark gray fabric

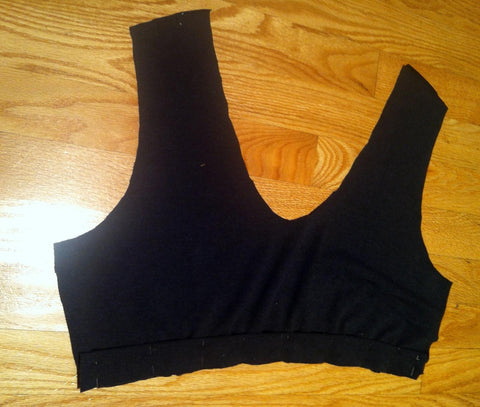
- Mark middle of Binding #2 and Front Bodice Bottom Piece. Fold Binding #2, wrong sides together and align raw edges with top of front bodice bottom piece. Pin at each end and where middle marks meet. Should not stretch as much as other binding piece. Sew (pic shows skirt attached, that step will happen later!) Flip binding up and topstitch seam towards bodice.

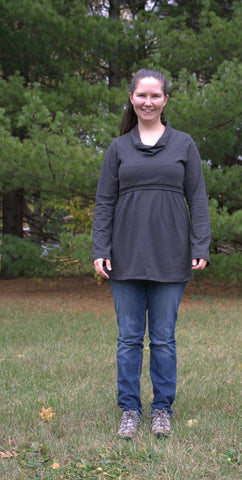
8. Follow directions #8 from original pattern to pleat front skirt piece. With right sides together, Align top of front skirt with bottom raw edge of Front Bodice Bottom Piece. Pin and sew. (now it will look like pic from step 7)

- Now, place Front Bodice Bottom right side up on table and place Front Bodice Top over it. Seam of top will match to seam between bottom and skirt. The binding of the top bodice should overlap about 1”. Baste together along side. The front is now 1 piece.


14. Follow steps #2-7 from original pattern for adding sleeves and cowl. Again, Remember that the picture will look a little different as the original pattern installs the skirt later in the process. Also, make sure binding on top of front bodice bottom is attached to front of armscye, not back. A corner of it will be cut off as armscye is a curve as we did not cut a curve into it earlier in the process.
15. Follow step #12 from original pattern for hemming
16. If you want pockets, follow step #9 from original pattern to attach pocket to sides of front skirt. Then, still right sides together, follow step #10 from original pattern (pictures will be slightly different as we already have bodice attached to skirt).
17. Follow steps #2-7 from original pattern for adding sleeves and cowl. Again, Remember that the picture will look a little different as the original pattern installs the skirt later in the process. Also, make sure binding on top of front bodice bottom is attached to front of armscye, not back. A corner of it will be cut off as armscye is a curve as we did not cut a curve into it earlier in the process.
18. Follow step #12 from original pattern for hemming
Enjoy!


A BIG thank you to Linda Stilling for all her hard work in preparing this tutorial for us! - Angie


