
A Mitered Corner Option for the Brighton Pullover
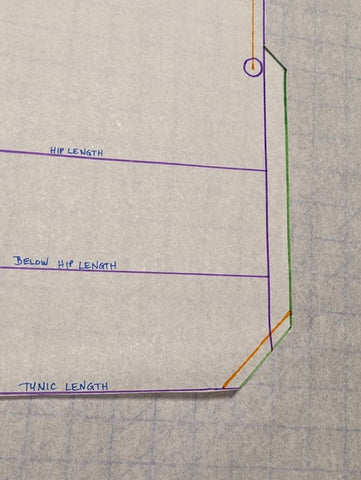
I think the easiest way to do a mitered corner is if the side seam allowance is the same as the bottom hem allowance. So, if we’ve got a one inch hem allowance we need to add 5/8ths of an inch to our side seam allowance, and have that extra seam allowance run up the side seam from the bottom to about an inch past the mark where the seam ends and the split starts. In these two photos the original pattern lines are in purple, new cutting lines are in green, and the seam lines are in orange.
Measure and mark twice the hem amount from the bottom corner on both the side edge and the bottom edge. In this case the hem is one inch, so you will measure 2 inches up the side and 2 inches along the bottom. Draw a diagonal line connecting these marks. This will be your stitching line (in orange). Now mark your cutting line at 3/8” out from your stitching line (in green).

This is your adjusted pattern piece:
I recommend that you finish the raw edges of the bodice sides and bottom with a serger at this point. Do not finish the diagonal edge. In this third photo I hope you can see that I’ve serged the side and bottom, but left the diagonal raw. I’ve dotted the diagonal with wash away marker. I sincerely hope it washes away!

We are now going to sew the miter! Fold the bottom corner, right sides together, so that your two finished edges of the side and the bottom meet and sew along where we cut on the diagonal. If this looks odd, just baste it to make sure you’ve got it folded right.

I like to sew this seam on a regular machine so that you can clip the corner and press the seam open before you turn it right sides out.

If you have a tailor’s clapper, now is the time to use it! It makes pressing into the corner a breeze.

Turn your corner right side out and gently poke out the point.

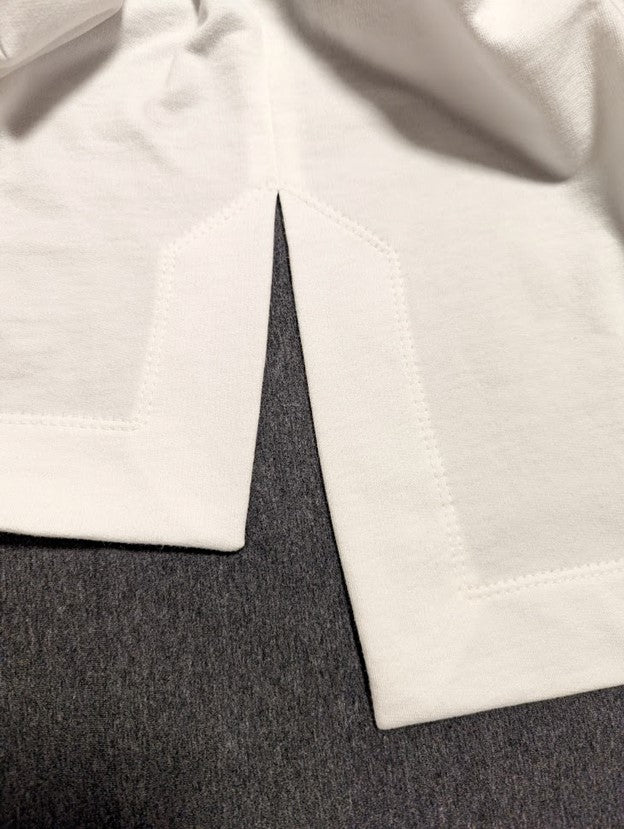
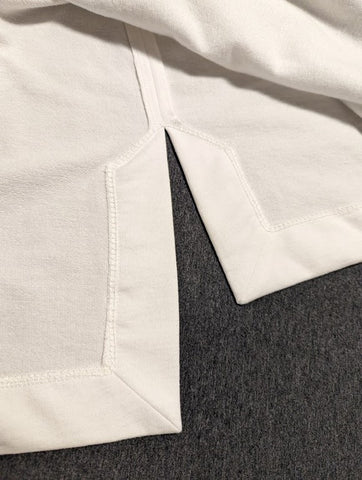
Now, sew up your side seams and stitch your hem in place. Normally I would have sewn the side seams up first, and finished the mitered corners after that. I think that is a little easier, but this worked okay and it was easier to take the pictures. Here is the inside:
And here is the right side:


Comment
Thanks for the tutorial, I was just thinking I wanted to do something similar on the street to studio. I love your patterns and tricks because it helps me think of sewing in a more exact and new way. I always learn from your patterns, site, and groups.
With that, I’ve got to ask…how do you coverstitch your corners so well.