The Hana bottoms are fantastic, but we know some people really like their gussets on legging style patterns. I'll walk you through how to put a gusset in these shorts and how it changes construction order for this particular pattern. You can also use these instructions to add the triangle gusset to any leggings pattern.
Cut out your triangle gusset.
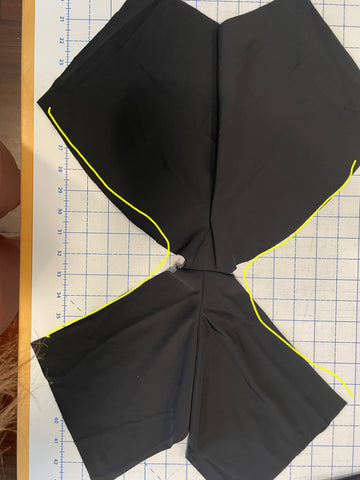
You can use either the gusset from the image below (just right click and save and then print at 100% scale) or use one from our leggings patterns! The image below also shows you a quick view guide of the changed order of construction for adding the gusset.

You should cut 2 gussets- 1 out of your main fabric, and 1 out of your lining. Then cut off the wedge of fabric from your back shorts crotch, both the main and lining pieces. The wedge you cut off will be 1" wide at the widest point and 2.5" long at the tallest point. Angle your ruler between these two points and cut off the little triangle. Make sure to do this for all 4 back pieces- 2 main and 2 lining.


Grab your triangle gusset

Sew gusset on
Attach the main triangle gusset to your main back piece, right sides together. Leave a bit of the bottom hanging off to account for your seam allowance. Sew with a stretch stitch at 3/8" seam allowance.

Sew back crotch together
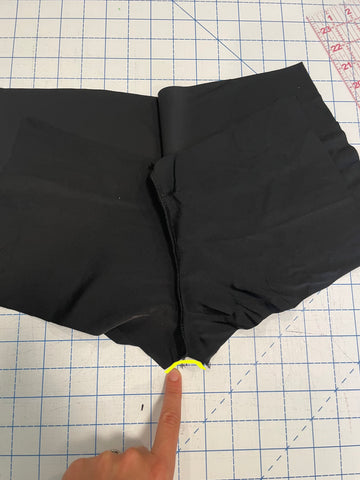
Now lay your other main back piece right sides together with the back main piece you just sewed, and sew along the entire back crotch, making sure to catch the top of the gusset in your seam. I like to maneuver my seam to the side so when the gusset is attached, my seam lines look like this. Repeat the above steps with your lining pieces


Sew main front pieces together
Sew both the main and lining front pieces together at the crotch. Open both pieces up and sew the main back and main front pieces right sides together along the inseam. Repeat for the lining.

**This is the most difficult with the shortest inseam and more difficult with the lining. If you didn't cut or sew precisely, you might end up with not fully matched inseams. If this is the case for you, you can either stretch the back inseam to fit the front, or match at the very center and sew what you have and then trim off the extra fabric you have. Personally, I didn't cut this completely perfectly and messed up my seam allowance on one side and chose option 2. Here's what this looked like for me, so you can know that all of us make mistakes while sewing things up. Hopefully your sewn together crotch looks prettier than this. These still ended up fitting me fine, so don't sweat it too much!

Sew the hems
If you are encasing the elastic/drawstrings:
Place the main piece and lining piece right sides together. Sew along the hem lines. If you are encasing the elastic/drawstrings, stitch 3/8" in, leave a 1/2" hole, and then stitch the rest of the way until you get to the other side. Stop 7/8" away from the edge and backstitch. Leave a 1/2" hole and then stitch the last 3/8". This leaves holes for your elastic or drawstrings.
If you are using the foldover method, there is no need to leave holes.

Turn right sides out

Finish the shorts
Continue construction as per the instructions at step 5. Sew the side seams together and then thread in your elastic or ties, and attach your waistband!


