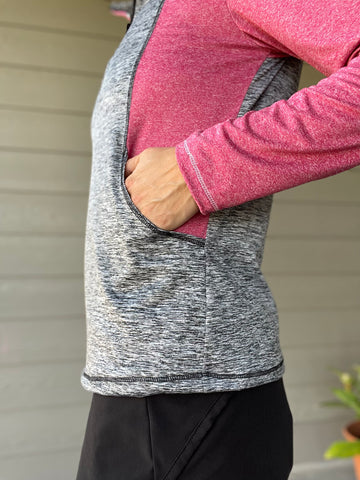
Lumia ½ Zip Hack
Pattern alterations
- Cut both front pieces and pocket on the fold adding 4" to all pieces
- Add 3” to sleeve length*
- Thin back body piece 1” from armscye to hem*
- Size down one**
- Cut interfacing 1” x length of zipper on bodice
*These alterations are for a tshirt style hem and sleeve. If you do want to have a banded hem, you will not alter the length on any pieces.
** If using a lightweight ABP and want a more fitted top.
- Press interfacing on center line of center front piece at neck and collar.

- Place pocket and center front piece RST. Serge/ zig zag stitch along pocket curve.

- Place front side piece RST with center front piece and pin in place. The angled front pocket will also line up with the middle pocket. Sew along all edges.
 Here is what the inside will look like when flipped:
- Flip right side out. Top stitch the curve as desired.

-
For install of the zipper and collar, check out the awesome tutorial on the Greenstyle Youtube channel.


-
Click the following link…https://www.youtube.com/watch?v=54Gj8PDxypc

-
Follow Lumia instructions to construct back, sew on sleeves, and sew front and back body together along side seam.
-
*If looking for a more fitted silhouette, follow the lines of the front piece. It is recommended to baste and check fit along the side seam.

- Attach inside collar and topstitch along the zipper and neckline.
- Turn hem of body and sleeves up by 1” and top stitch as desired.
- Tadaaaa! Your 1/2 zip Lumia is done!


Kommentare
Hi
This looks great and I’m going to give it a try.
One question though about adding 4 inches to the length.
Where did you add the 4”?
Was it at the lengthen/shorten lines on the pattern
or
was it at the bottom of the garment which would then make the pickets very deep?
Thanks so much.
Kim 😊
I love your hack! I often prefer a shorter zipper and pullover to a full zipper. I also like the changes you suggested for a lighter fabric and without the bottom band. Your fabric closer to the weight of fabric I intend to use for my jacket.
Love it!